
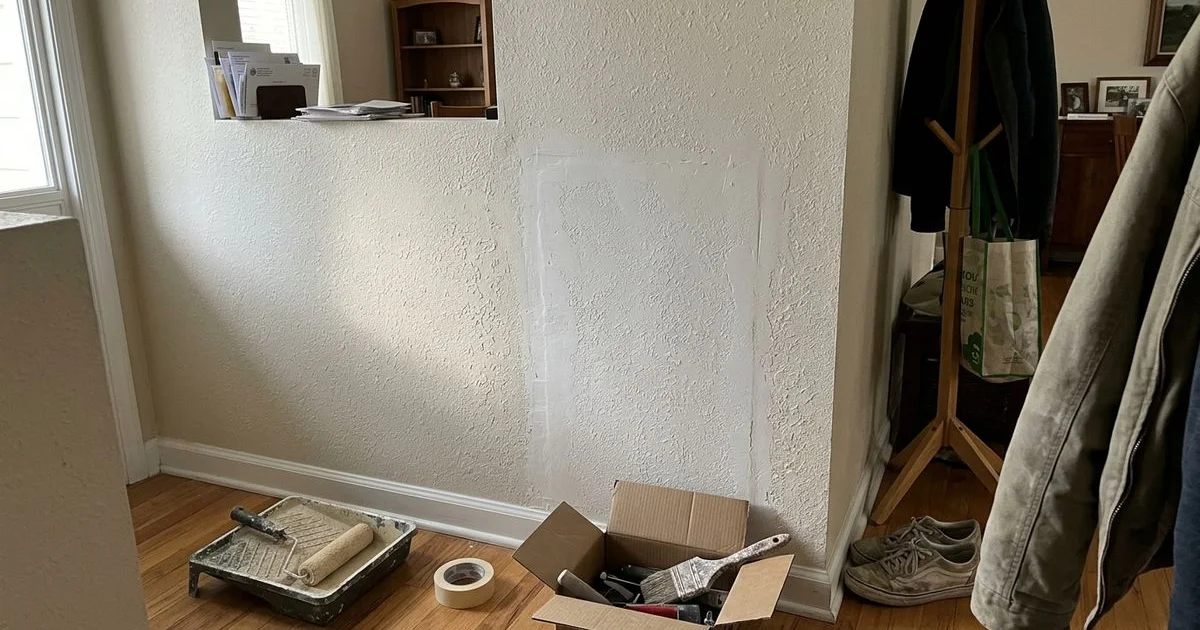
Texture Is What Makes a Repair Disappear
A perfectly smooth drywall patch is only half the job. The surface pattern is what actually makes the repair invisible. When our team handles drywall repair in Georgetown, identifying and matching the existing wall texture is always the most critical step. Skipping this detail leaves a glaring, mismatched spot that catches light differently from the rest of the wall.
The human eye picks up on slight shadow differences, especially under angled light from windows. Without a matching surface pattern, the repaired area reflects light unevenly and reads as a permanent blemish.
Three Common Wall Textures
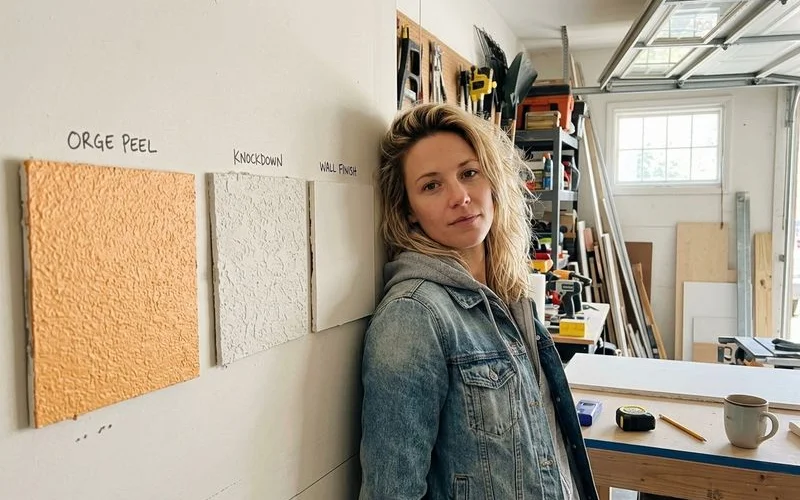
Most homes in Central Texas feature one of three standard finishes. Identifying yours dictates the tools and technique required for an invisible match.
Orange Peel
Fine, rounded bumps resembling the skin of an orange. This texture is sprayed on using compressed air and left to dry without any smoothing. Matching requires a specialized hopper gun with air pressure set between 40 and 45 PSI and compound thinned to a pancake batter consistency. Homes built from the 1980s onward commonly feature this pattern.
Knockdown
Larger splatters of joint compound sprayed on and then lightly flattened before drying completely. The result is a flat-topped, splotchy pattern with smooth valleys between the peaks. A 24-inch Lexan knockdown knife is the preferred flattening tool because the flexible plastic blade glides over the wet compound without gouging. This style appears frequently on both walls and ceilings across Georgetown and Williamson County.
Smooth
No added texture at all. These flat surfaces require the most precise finishing because every imperfection shows under bright light. Achieving a true Level 5 finish per Gypsum Association GA-214 standards requires a thin skim coat of compound over the entire wall to cover raw drywall paper, taped seams, and fastener heads.
How to Identify Your Texture
Shine a flashlight parallel to the wall to create raking light. The harsh shadows this produces make the surface pattern immediately obvious.
| You see | You probably have |
|---|---|
| Small, even bumps | Orange peel |
| Flattened, irregular splotches | Knockdown |
| Little or no texture | Smooth |
| Swirls or arcs | Hand-troweled or specialty texture |
The Matching Process
Professional wall texture matching is a deliberate sequence of testing and application.
- Finish the repair flat. Tape, mud, and sand the patch completely smooth first.
- Test on scrap. Spray a spare piece of drywall to dial in the compound thickness, air pressure, and droplet spacing.
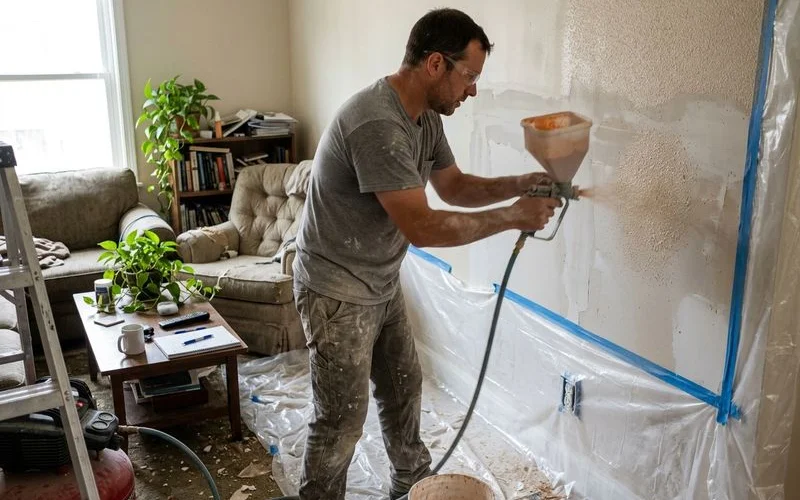
- Apply to the patch. Orange peel and knockdown are sprayed using a Marshalltown hopper gun. Knockdown gets flattened with a wide blade at exactly the right moment before the compound sets.
- Feather the edges. New spray blends 12 to 18 inches past the repair area so there is no hard visual border.
- Dry completely. The mud needs a full 24 hours to cure before primer can go on.
Why Primer and Paint Follow Immediately
Raw joint compound is highly porous and absorbs topcoats at a different rate than the surrounding wall. Painting directly over fresh mud causes flashing, where the repaired spot looks dull or slightly different in sheen from the rest of the surface.
A coat of PVA (polyvinyl acetate) drywall primer seals the porous compound and equalizes the absorption rate. Limestone & Lacquer then paints the entire wall from corner to corner rather than spot-rolling over just the patch. This full-wall approach eliminates any visible transition between old and new paint.
When a Full-Wall Re-Texture Makes Sense
Sometimes blending a small area into an existing pattern is not the most cost-effective approach. Re-texturing the entire wall surface is the better option when:
- Multiple repairs on one wall make spot-matching impractical
- The original texture is unusual or was applied unevenly by hand, making duplication nearly impossible
- Large replacement sections create wide seams that are harder to feather invisibly
- You want to change the style, such as moving from heavy knockdown to a lighter orange peel
For extensive damage, our guide on patch vs replace explains when hanging a new section of drywall is the right starting point.
Ceiling Texture Is Harder to Match
Ceilings are more challenging because raking light from windows and fixtures constantly highlights surface inconsistencies. Gravity also pulls wet compound differently when applied overhead, causing sag and uneven texture thickness.
Ceiling repairs typically require slower application to prevent dripping, careful blending around existing light fixtures, and up to 48 hours of drying time in humid conditions before priming.
Changing Your Wall Texture
A repair project is an opportunity to update a room’s finish entirely. Common upgrades include moving from knockdown to a subtler orange peel, converting any texture to a Level 5 smooth finish through full skim coating, or re-texturing an entire room to eliminate years of patchwork.
Changing a wall pattern adds labor hours and material cost, but the result can significantly modernize a dated interior.
Why DIY Texture Rarely Works
Aerosol texture cans from brands like Homax can handle tiny dings, but they lack the consistent air pressure needed to replicate professional splatter patterns. Pressure inside the can drops as it empties, causing the compound to spit unevenly. If the spray goes on too heavy or too light, the patch stands out immediately.
For anything larger than a small doorknob hole, a professional with an air compressor and hopper gun produces a dramatically more accurate match.
One Crew, One Continuous Job
Orange peel vs knockdown texture matching is entirely achievable with the right equipment, testing, and technique. Limestone & Lacquer handles the full sequence of drywall repair, texture application, PVA primer, and finish painting as a single continuous project. Contact our Georgetown team to schedule your repair.